What do you do when you need to attach an iPhone to a tripod? 3D print an adapter of course. You can find the printable file here (if that’s what you’re looking for), and for the rest of the article I’ll talk a bit about the process of designing the piece.
Pre-Design
I was helping a friend record test footage for their YouTube channel, and we planned to use an iPhone as our recording device. To get an idea of what different camera shots would look like we decided to use a tripod to hold the phone, until we realized there was no way to mount it. I had the perfect solution though, a copy of Fusion360 and a 3D printer.
I knew that making a mount able to hold the phone would be relatively easy, but the way it attached to the tripod was with a screw. Having never printed a threaded hole before, I wasn’t sure it would actually attach. 3D printers have a limited accuracy, they print in layers and the nozzle’s movement isn’t necessarily perfect, so I was worried about whether the threads would be too fine a detail. To make sure I wasn’t wasting my time, I made a rectangle with a threaded hole as a test. The test block attached to the tripod, and I knew I could make a working adapter to hold the phone.
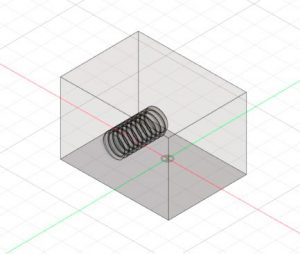
CAD Model of the Thread Test Block
Now I just had to figure out what I wanted the mount to look like and to do that I listed my requirements.
Requirements
- Firmly holds the phone in place, doesn’t allow it to shake around
- The mount allows for the camera to be held at different angles, so it needed to be able to keep hold of the phone at those angles as well
- Easy to get the phone in and out, don’t want to have to break the mount to get the phone in or out
- Allows user access to the screen, we need to be able to use the video controls
- Minimizing the material used, don’t want to spend hours waiting for the print
The Design
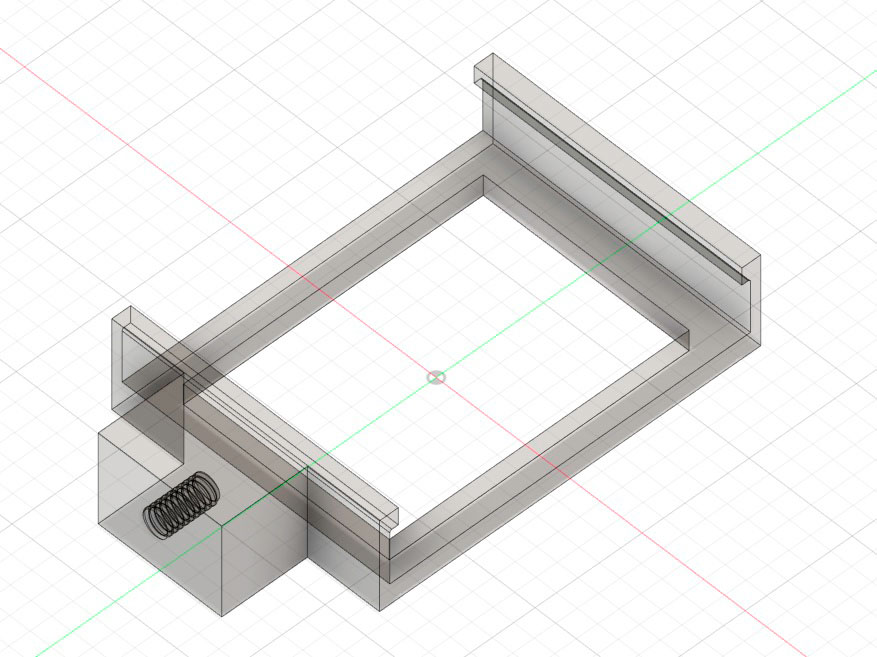
Based on what my requirements were for the design, I decided a simple friction fit mount would be the best option. I measured the width of the phone, and the length from the bottom of the phone’s camera. Then I got to work drawing out rectangles in my CAD program until I had something that could hold a phone and screw onto the tripod.
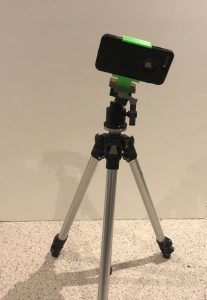
Before I converted saved the file to be printed, I made a couple of modifications. Because the phone is so light, there wasn’t a lot of support needed, and most of the plastic on the back could be removed. This ended up making the final pieced more flexible, and the phone can be mounted in either direction when recording video while still offering access to the screen. I also put a curve on the inner corners where the phone is held. I did this, so the phone makes contact with the front sections of the mount even if the print was slightly off, giving the mount a tighter grip. With those changes made, I was ready to print.
-

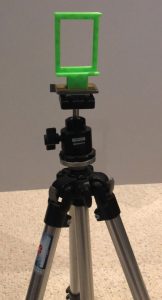
- CAD image of the Mount
-

- Glow in the Dark Print
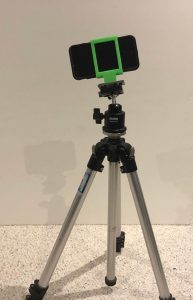
And it Worked!
In the end it was definitely worth the time designing this mount. Ignoring the time spent designing and printing the test rectangle, I spent about three hours doing the design and print. Most importantly though, it worked! I now have an adapter that holds a phone in a specific case and attaches to standard 1/4-inch tripod screw mounts. It seems to be pretty durable too. I’ve unscrewed it and reattached it to the tripod, slid the phone in and out a good number of times, and dropped it once, and the phone mount has help up.
And that’s really the best part of having a 3D printer. Running into a problem and being able to design your way out of it, and finally seeing that design function in the real world.