
In this post I’ll be talking a bit about an iPhone stand I designed in Fusion 360 and printed on my FlashForge Dreamer 3D printer. Once I have used the printer more, I’ll write up a post with detailed thoughts on it. For now, I’m quite happy with how it’s performed. Other than needing to use some Loctite to secure screws on the pulleys, it’s been straightforward to use.
Why Did I Make This?
I was using my phone to watch a show while I was running simulations for class and I thought “Oh, this is why people buy phone stands, looking down at the desk is too much work.” So when I found myself with access to a 3D printer, and modelling software, I decided to build a solution.
Stages of Design
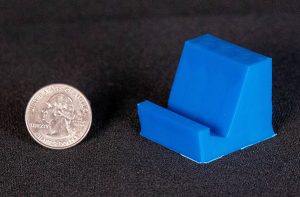
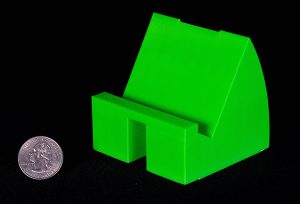
I made a first design that had no room for the charger. This was put together quickly because I wanted to try printing something I had designed instead of downloaded. Since a print takes about three hours, I wanted to make sure my printer would properly handle the 30o incline having used it only a few times before. That led me to printing this mini-stand at one-quarter scale. I’ve also added a quarter for scale to the picture.
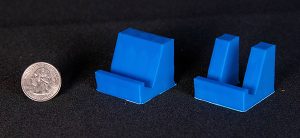
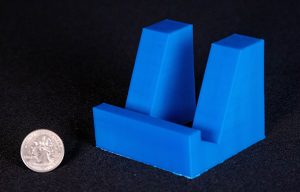
This version of the stand didn’t just lack a charging port, the back area is completely filled in. Once I printed the prototype, it struck me how much material would be needed for the full-size version. With the goal of minimizing the material used and time spent printing I removed a section from the back to leave two separate legs. Below you can see the one-quarter scale models of the original and the new two-legged design.
Finally I felt comfortable printing the full-size version of my phone stand, and the result was just what I had hoped for.
When I showed this off to my father, he asked if I could make one for him that had space for headphones so that he could use his phone in portrait orientation while making calls. The changes needed for that were pretty simple, I just had to measure the clearance needed for the Lightning headphone connector to fit. Once I knew the space needed, I raised the base of the model and cut a hole for the headphone connector.
I also took this chance to make the space where the phone sites much closer to the actual size of the phone. I had left this a bit large originally because I worried about how accurate to the model the print would be. Once I saw how my first stand came out and compared the measurements to my model, I was confident enough in the printer to lower the margin for error. Once I looked at the model on my computer, I realized that I would have to add some material to the back portion of the stand again. I added material back to fill in just the back-rest section figuring that would be a good way to give it back some structural integrity. Finally, I decided that in the interest of reducing the material a bit after the previous step and wanting to have a less blocky look, I would give the legs a curve.
And that’s the final design of my phone stand. It works very well for video calling like Skype or Facetime when you have the phone in portrait mode and plugged into headphones or power because the cord keeps the phone from sliding in the stand if you decide to move it. Plus it holds the phone in landscape orientation if you just want to watch a show.
If you have a 3D printer and would like to try printing one of these for yourself, the model is linked here on Thingiverse. I recommend using hockey or felt tape on the underside if you have a slippery desk.